Template builders in the Alexa Skills Kit Node.js SDK
In the last post in the Dig Deep series, we looked at the new ResponseBuilder class that added functionality for the Echo Show. I kept referring to template objects and I promised to show you how those are assembled. Here it is!
As a reminder, this is the Dig Deep series, where we look line-by-line at the tools and libraries we use to build voice-first experiences. This is not the place to go for tutorials, but if you want to learn interesting little nuggets about what you use every day, off we go…
Templates
On the Echo Show, there are several ways to display data, however there are not endless ways like there are on the web or on a mobile app. Instead, Amazon provides you with a few set ways of showing your text or images through either cards or templates. Cards have been around since the very beginning of Alexa in the Alexa mobile apps, showing some text and optionally an image. Rich templates, meanwhile, came with the release of the Echo Show.
If your skill only targets screenless devices, but you display cards, then the Echo Show will display those. If you provide a template, it will use that. Since templates can provide a more vivid experience, such as touch interactions, it is recommended to put in the extra effort to craft the templates and check whether the invoking device can handle them. However, whispers from other Alexa devs put the number of skill invocations on a Show at less than 10%, so that may influence your decision.
Template Types
Amazon provides a set amount of templates with which we can slot in data. There are two main types: body and list. Body templates are generally for blocks of content while list templates are just what they sound like.
BodyTemplate1
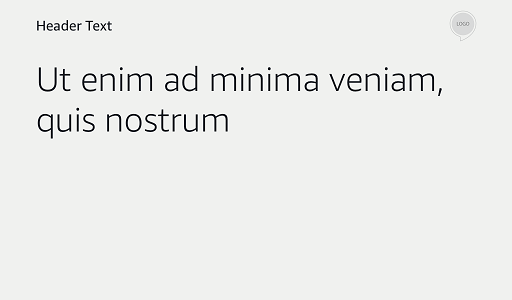
- Text (required)
- Title (optional)
- Background image (optional)
The first body template has required text that the user can scroll if it goes outside of the viewable window. There is an optional title and an optional background image. Also displayed is the skill icon: set in the developer portal and not something that can be changed at render time.
Watch out: the official documentation implies that you can provide a hint (e.g. `Try “Alexa, tell me the latest scores.”`) to help prompt the user what to do next, but BodyTemplate1 in fact does not support the hint directive.
BodyTemplate2 and BodyTemplate3
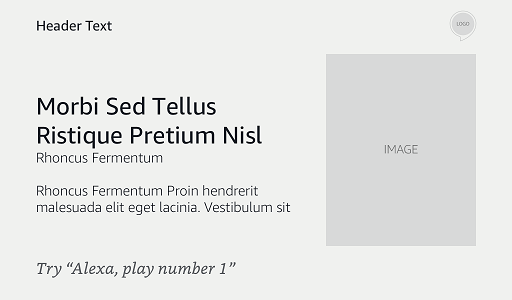
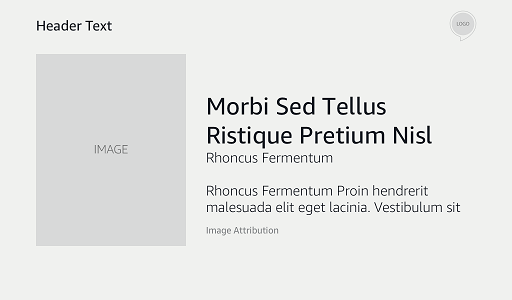
- Text (required)
- Title (optional)
- Background Image (optional)
- Content Image (optional)
Body templates 2 and 3 are familiar in most ways except three significant diversions:
BodyTemplate2places the optional image on the right-hand side, while 3 has it on the left. (Both leave space for the image if you don’t specify one.)BodyTemplate2allows for a hint;BodyTemplate3does not.BodyTemplate3allows for scrollable text if it extends beyond view.BodyTemplate2does not.
BodyTemplate4 and BodyTemplate5
Just kidding. There are no templates with the type of BodyTemplate4 and BodyTemplate5. You can technically set these values, but you will be unable to provide anything beyond a title and a background image.
BodyTemplate6
- Text (optional)
- Background Image (optional)
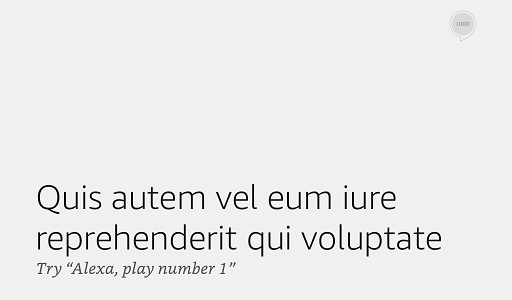
BodyTemplate6 shows a full-screen image with text over it that cannot scroll. The strange thing is the official documentation says that it can scroll, but this isn’t the case in practice. Getting everything right in documentation is tough, so don’t be too hard on Amazon for this one. (And please forgive me if I make a mistake sometime!)
The thing that stands out to me about BodyTemplate6 is that nothing is required. In practice, you could take advantage of this to skip the text altogether and use a background image that mimics the layout that you want. It likely wouldn’t be too dynamic since you wouldn’t want to incur the extra overhead of creating the image on the fly. But if you could account for the different combinations and you have the design, this could really make your skill stand out. Think, for example, if you had a skill to display the amount of time to the next train: you could create an image for each train/time combo.
I did something similar for an as-yet-unpublished skill for the upcoming World Cup:

That’s it for the body templates now. It’s always possible that Amazon will come out with more in the future, but there is a surprisingly large number of things you can do with them now. I’ve seen some skills that create a grid of clickable icons by “hacking” the body templates. The only unfortunate thing here is that there’s not better tooling for developing locally—the trail and error that leads to these kinds of discoveries is often frustratingly slow with the current tool set.
Next up we’ve got the list templates that allow you to list out a number of items.
ListTemplate1
- List items (rich, plain text, or images) (required)
- Background Image (optional)
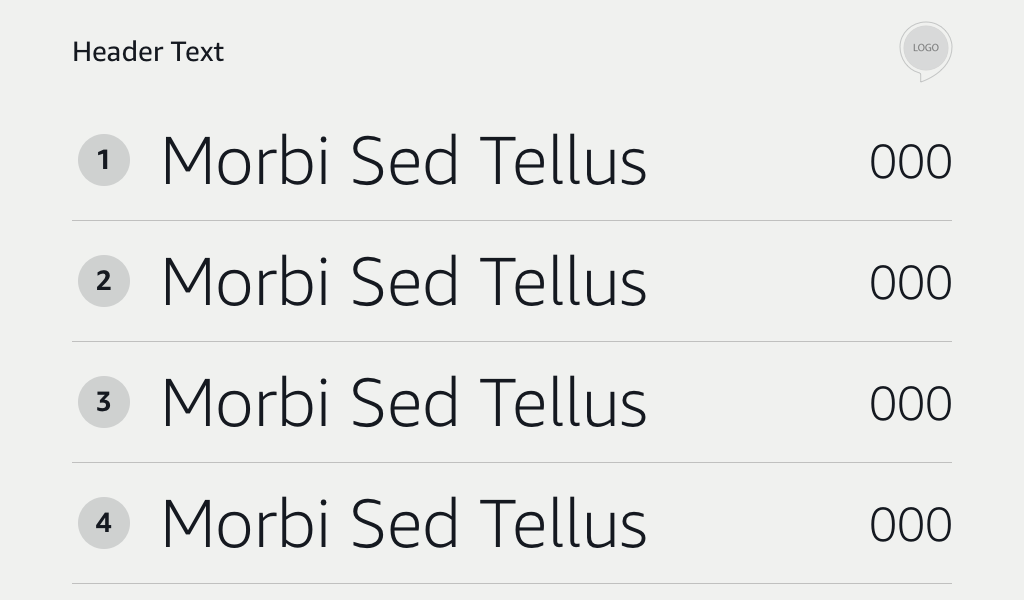
ListTemplate1 is a vertical, scrollable list of items. In the example above, there is primary and tertiary text but no secondary text. These items can be interacted with by using “actions,” which we’ll examine in our next post in the series.
ListTemplate2
- List items (rich, plain text, or images) (required)
- Background Image (optional)
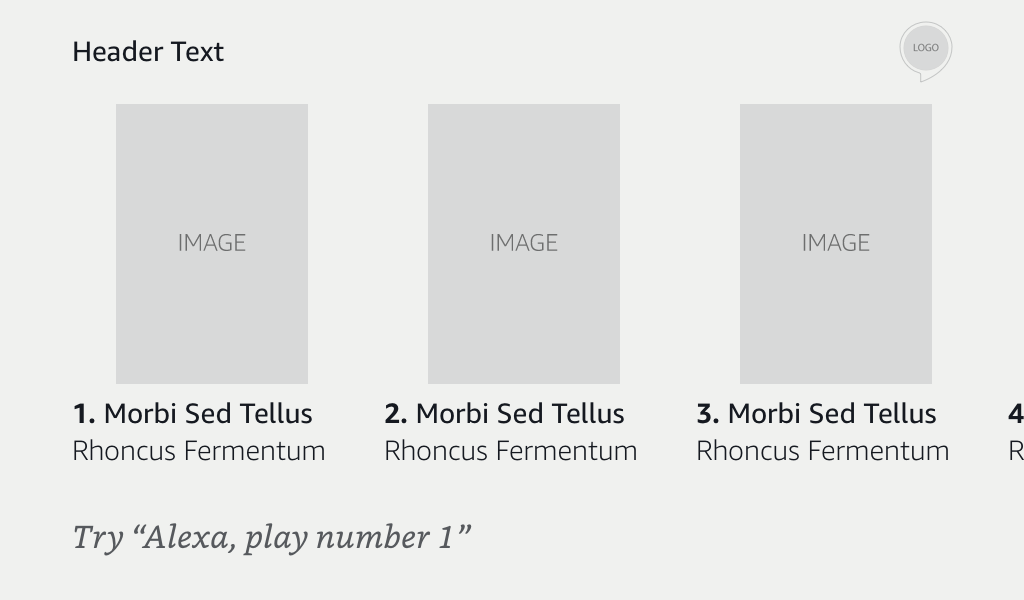
On the other hand, ListTemplate2 is a horizontal, scrollable list of items. While ListTemplate1 lends itself to textual data, ListTemplate2 is better for more graphical information with its large images taking up nearly 2/3 of the screen.
The Code Behind Template Builders
The code behind the template builders boils down to a single class (TemplateBuilder), a class for each template type that extends the base class, and one more class for building individual list items. There’ll be a lot of duplication here if I place the code for each sub-class, so I’ll look at the base class, link to the code for each sub-class, and examine where they differ.
TemplateBuilder
'use strict';

class TemplateBuilder {
  constructor() {
    this.template = {};
  }

  setTitle(title) {
    this.template.title = title;
    return this;
  }

  setToken(token) {
    this.template.token = token;
    return this;
  }

  setBackgroundImage(image) {
    this.template.backgroundImage = image;
    return this;
  }

  setBackButtonBehavior(backButtonBehavior) {
    this.template.backButton = backButtonBehavior;
    return this;
  }

  build() {
    return this.template;
  }
}

module.exports.TemplateBuilder = TemplateBuilder;
The first thing we see is the constructor and that it’s setting an object on which we will place all of our template properties. This is the same object you would be building yourself if you were creating a template by hand. It’s illustrative to show that nothing else is going on here. If you have read previous installments of the Dig Deep series, you should notice that this happens over and over—just a bunch of objects getting built up.
Next we have four “setter” methods. These aren’t true setter methods, but by returning this for each it allows for chaining of these methods rather than individual assignments in order. The four setter methods set the:
- title
- token
- background image
- back button behavior
The title and background image are clear enough. What are the token and back button behavior used for?
The token allows you to link between templates using actions. You can think of these as a URL/href pair on a webpage. It also allows the back button to know where to take the user back.
The back button behavior accepts one of two values: "HIDDEN" or "VISIBLE". These are self-explanatory and it’s interesting to see that the developer can set the behavior. You might wonder why you would ever want to hide the back button. The example that Amazon gives is the situation where someone is in the middle of a quiz and you wouldn’t want them to go back to the previous question. Another example might be one where a user has taken a destructive action (for example, deleted a photo) and there is nothing to which they can return.
All of these are doing nothing more than adding a property onto this.template. After all of that is the build method. Generally you think of a method named build as doing a lot of assembly and putting everything together. Not here. All it does is return the template object. In fact you could just as easily do this:
const builder = new TemplateBuilder();

const template = builder.setTitle('My Title').template;
// Compared to builder.setTitle('My Title').build();
This is the base class. Let’s next look at the subclasses that inherit from it.
Template Builder Subclasses
The body templates are nearly identical, with two differences:
- The type, of course, is different for each one
- BodyTemplate1 does not have a method for setting an image
We’ll look at BodyTemplate6 as the reference. Just keep in the mind the previous two points.
'use strict';

const TemplateBuilder = require('./templateBuilder').TemplateBuilder;
const TextUtils = require('../utils/textUtils').TextUtils;

class BodyTemplate6Builder extends TemplateBuilder {
  constructor() {
    super();
    this.template.type = 'BodyTemplate6';
  }

  setImage(image) {
    this.template.image = image;
    return this;
  }

  setTextContent(primaryText, secondaryText, tertiaryText) {
    this.template.textContent = TextUtils.makeTextContent(primaryText, secondaryText, tertiaryText);
    return this;
  }
}

module.exports.BodyTemplate6Builder = BodyTemplate6Builder;
The BodyTemplate6Builder and all others extend TemplateBuilder.
In the constructor they invoke super—required in JavaScript subclasses in order to have access to this, but also used in this specific case to add the template object to the context.
There are two methods here: setImage and setTextContent. Again, BodyTemplate1 does not have setImage. The very important thing to note here is both accept not a string, but an object (or at least one object in the case of setTextContent). The object can be created by hand, but more often you will use Alexa.utils.TextUtils.makePlainText, Alexa.utils.TextUtils.makeRichText, or Alexa.utils.ImageUtils.makeImage. We will look at those in-depth in a future dig-deep post, but what you need to know now is that:
- The text utilities accept strings of text (either plain or rich (e.g. styled), depending on the utility)
- The image utility accepts a URL, width in pixels, height in pixels, size string for the image (X_SMALL, SMALL, MEDIUM, LARGE, or X_LARGE), and a description of the image
On the other hand, the list template builders are completely identical except for the template type. We’ll use ListTemplate1Builder as a reference point:
'use strict';

const TemplateBuilder = require('./templateBuilder').TemplateBuilder;

class ListTemplate1Builder extends TemplateBuilder {
  constructor() {
    super();
    this.template.type = 'ListTemplate1';
  }

  setListItems(listItems) {
    this.template.listItems = listItems;
    return this;
  }
}

module.exports.ListTemplate1Builder = ListTemplate1Builder;
This has only one method other than the constructor: setListItems. This takes an array of list items. List items are just objects, but again not ones that you would likely assemble by hand. They are created by the ListItemBuilder.
ListItemBuilder
'use strict';

const TextUtils = require('../utils/textUtils').TextUtils;

class ListItemBuilder {
  constructor() {
    this.items = [];
  }

  addItem(image, token, primaryText, secondaryText, tertiaryText) {
    const item = {};
    item.image = image;
    item.token = token;
    item.textContent = TextUtils.makeTextContent(primaryText, secondaryText, tertiaryText);
    this.items.push(item);
    return this;
  }

  build() {
    return this.items;
  }
}

module.exports.ListItemBuilder = ListItemBuilder;
The ListItemBuilder has constructor, addItem, and build methods. Just like we saw before, the constructor does setup and build does nothing but returns an item off of this.
The more interesting method is addItem. It takes up to five arguments: image, token, and then primary, secondary, and tertiary text. Once again, the image is an image object that you will build with the image utility. The token is used to reference a list item in the action that you want Alexa to take. And the texts are not strings, but text object built with the text utility.
In use, your code would look like this:
const makePlainText = Alexa.utils.TextUtils.makePlainText;
const makeImage = Alexa.utils.ImageUtils.makeImage;

const builder = new Alexa.templateBuilders.ListItemBuilder();
const template = builder
                  .addItem(
                    makeImage('https://example.com/image.png'),
                    'firstItem',
                    makePlainText('First Item')
                  )
                  .build();

this
  .response
  .speak('Template coming right up!')
  .renderTemplate(template);

this.emit(':responseReady');
What you need to know about the template builders is that they’re quite simple. They exist to help you not have to build objects by hand every single time. When using them you need to:
- Decide which template you want to use: this is largely driven by whether you want just text, text and image, or even just images; and whether you want that to be in prose or list form
- Use the correct class from the Alexa.templateBuilders namespace
- Set each item within the template, using methods such as setTitle, setBackgroundImage, etc. and chaining as you go along
- Calling build at the very end of the chain, which does nothing more than return the object that it’s been building all along
- Pass that built template to renderTemplate, which is a method off of the response object
And that is all! Remember not to rely on the templates. Use them as a garnish at the very end of the meal you’re putting together. That’s why it’s called voice-first: voice should always remain the main course when building for Alexa.
Next time in the Dig Deep series we’ll look at the text utilities and ways to create rich text that came with this same release. A lot of new changes recently in the Alexa Node.js SDK so we’re a bit farther away from the end of the series then we were before, but we’re getting there and these new changes mean even new features for us Alexa devs.